Once an agent is connected to Git, you can create branches to experiment safely and promote changes to production when they are ready. A common setup uses two branches: main for production and non-prod for experimentation. Production keeps running on main untouched, while on non-prod you can rewrite instructions, swap models, and test new prompts with no impact on live traffic.

Creating a branch

  1. Select the GitHub icon at the top of the agent view to open the Git menu.
  2. Select Branches, then Create Branch.
  3. Pick the source branch the new branch should be created from, and give it a name (for example, non-prod).
As soon as the new branch is created, the agent automatically switches to it, so you can start experimenting right away. You can create as many branches as you need.

Switching branches

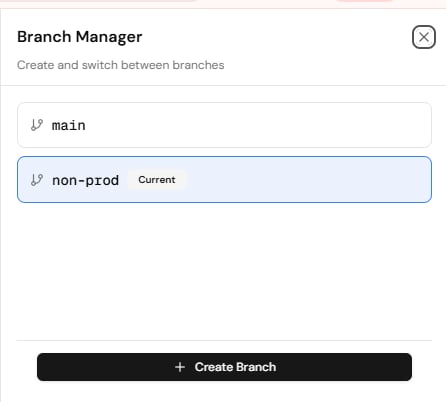
The Branch Manager lists every branch and marks the one you are currently on. Select any branch to switch the agent view to it; the branch name shown at the top of the agent updates to match. The Branch Manager, listing the main and non-prod branches with non-prod marked as current.
Promoting a branch

When you are happy with what is on your lower branch, promote it.
  1. Open the Git menu and select Promote Branch.
  2. Set From and To, for example from non-prod to main.
  3. Choose how to promote: open a pull request or merge directly.
  4. Give the promotion a title and an optional description of what changed, then select Create Pull Request (or merge).
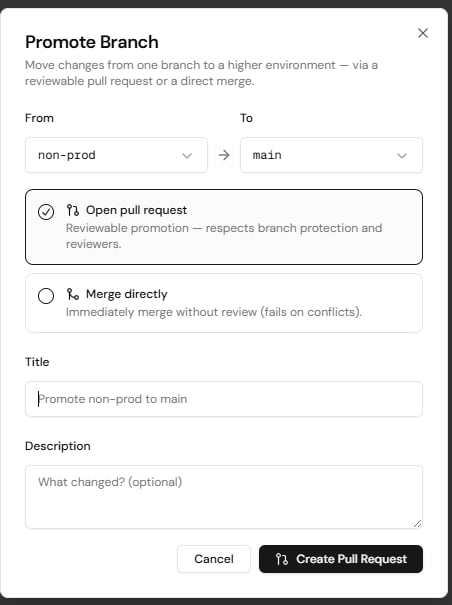
The Promote Branch dialog, with From and To branch selectors and the choice between opening a pull request and merging directly. The two promotion options serve different situations. Open pull request is the safer, process-driven path: an approver reviews the pull request in Git and merges it, conflicts can be resolved during review, and the promotion respects branch protection rules and reviewers. Merge directly is the fastest path to production: it merges immediately without review and fails if there are conflicts, so it is best when changes are small and low-risk.
Sync is bi-directional. Whatever you change in Git and whatever you change in Studio stay in sync, in both directions.

Commit history and restore

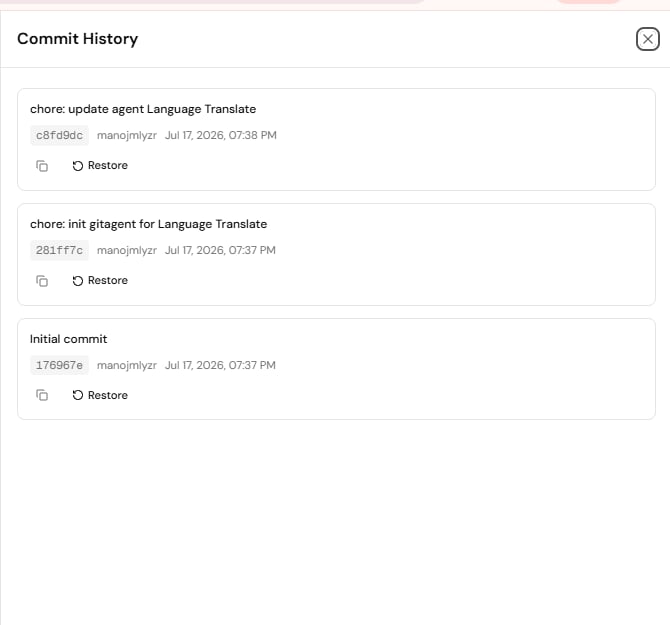
Select Commits in the Git menu to see the full history for the agent. Every commit is tracked with its hash, author, and timestamp, and any commit can be restored with a single click using Restore. The Commit History panel, showing commits with hash, author, and timestamp, each with a Restore action.
Pulling remote changes

If changes were made directly in the Git repository, select Manage Git and then Pull from GitHub to bring the latest remote changes into the agent.

Branch protection

Branch Protection in the Git menu lets you protect a branch so that promotions into it go through review. Pull requests opened from Promote Branch respect these protection rules and reviewers.