> ## Documentation Index
> Fetch the complete documentation index at: https://docs.lyzr.ai/llms.txt
> Use this file to discover all available pages before exploring further.
# Managing Agents in Lyzr Agent Studio
> Steps to create, update, and delete agents in Lyzr Agent Lab
## Creating an Agent
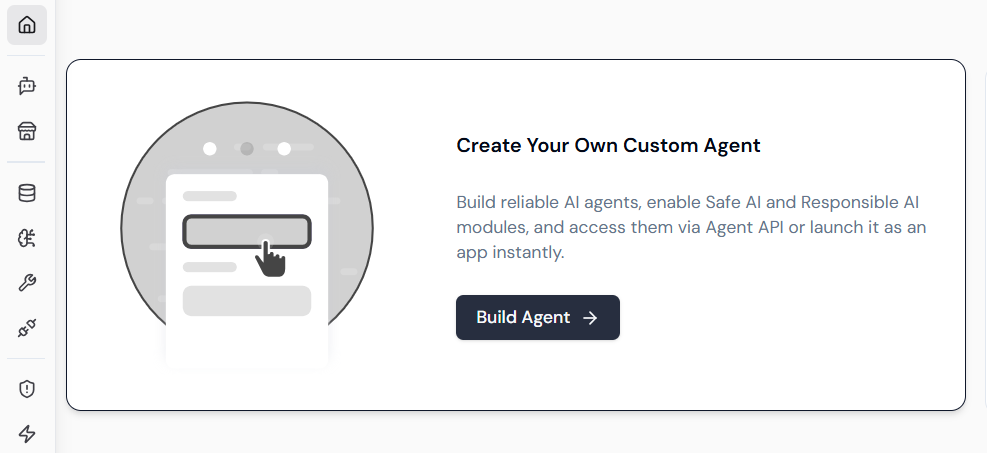
1. **Navigate to Agent Builder:**\
From the Lyzr Agent Studio page, select **Build Agent**.
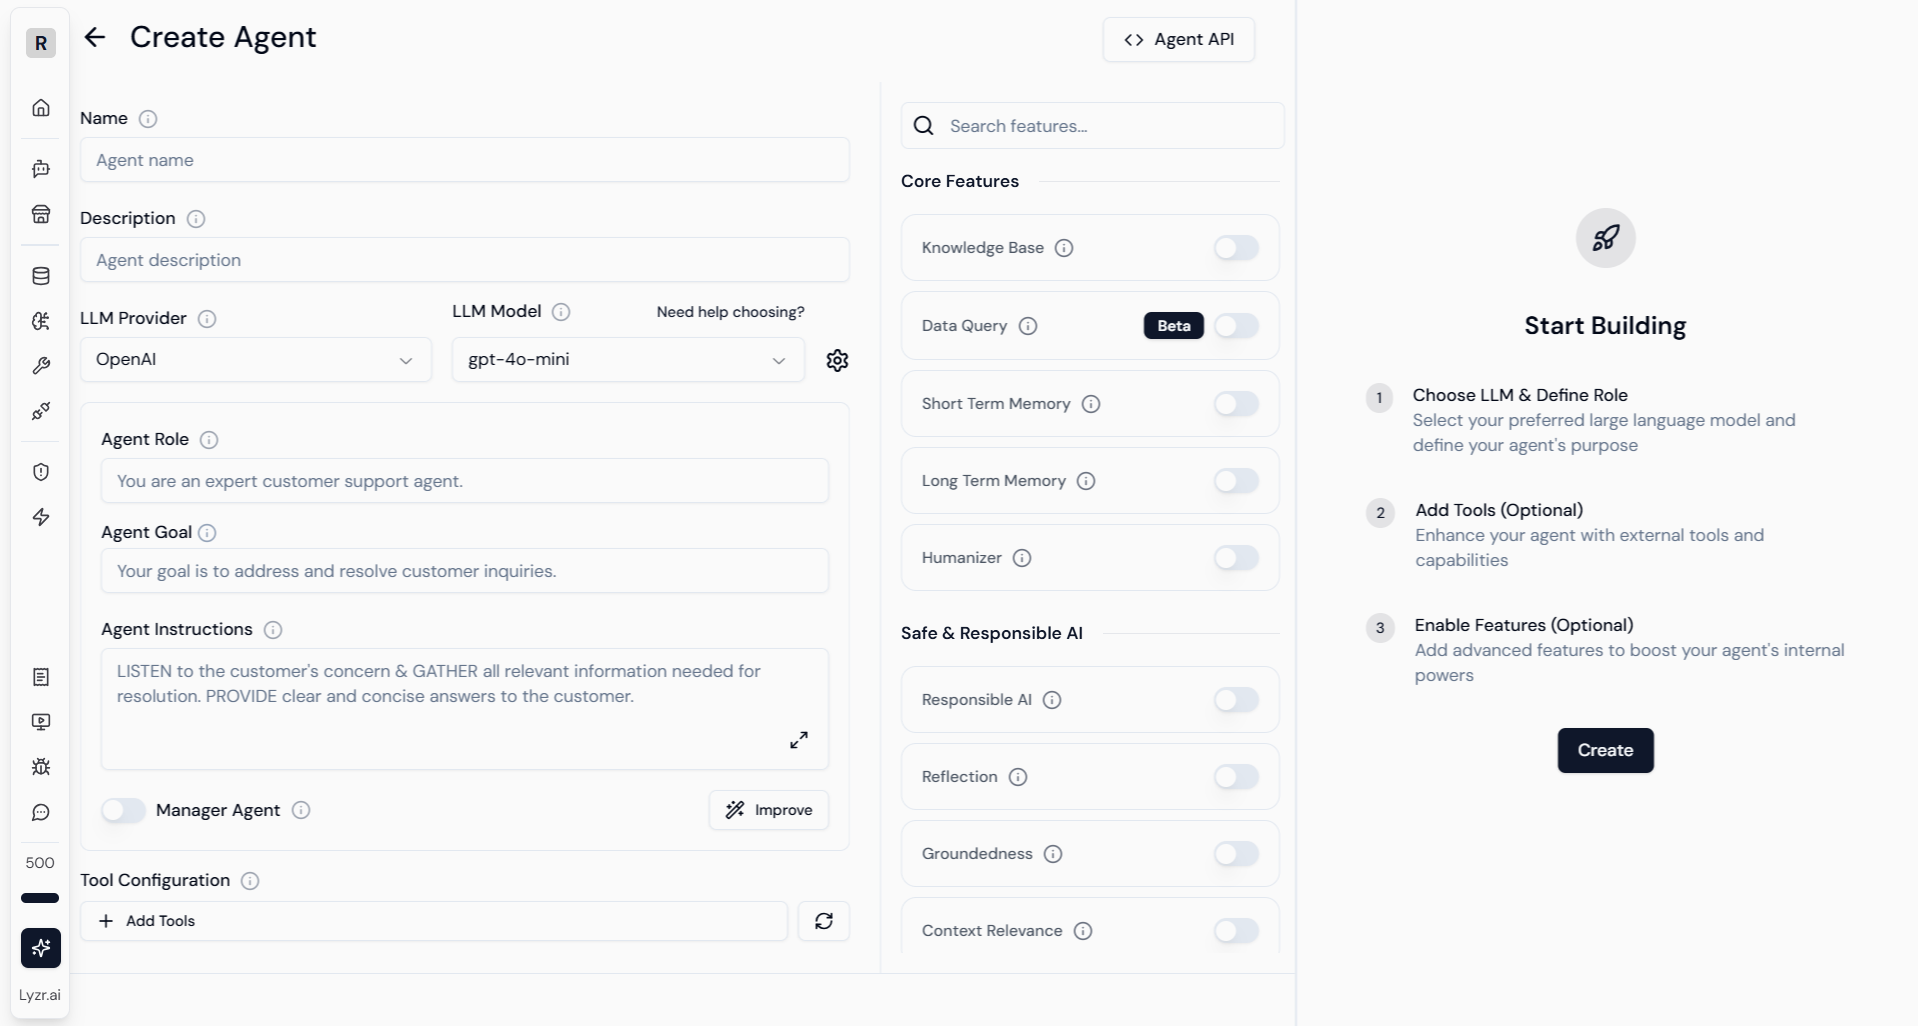
2. **Provide Agent Details:**\
Enter a unique name for your agent and add a detailed description outlining its purpose.
3. **Select LLM Model:**\
Choose an appropriate Large Language Model provider and specific model for your agent’s use case. Configure parameters like temperature and Top P as needed.
4. **Define Agent Role and Instructions:**\
Specify the agent’s role (e.g., Customer Support, Data Fetcher) and provide instructions to guide its behavior. Use the **Improve** feature to refine these details.
5. **Add Tools (Optional):**\
Enhance your agent’s capabilities by integrating tools such as email sending, database queries, or custom APIs.
6. **Add Examples and Knowledge Bases (Optional):**\
Provide example prompts and responses to train your agent, and link relevant knowledge bases to improve accuracy.
7. **Select Features:**\
Choose from available features to further customize the agent’s behavior and output.
8. **Create and Test Agent:**\
Click **Create Agent** to save. Test the agent with sample queries and fine-tune as needed.
9. **Deploy Agent (Optional):**\
Deploy your agent by publishing it to the Agent Marketplace or use the provided JSON and API key for integration into your applications.
 ***
## Updating an Agent
1. **Access Agent List:**\
In the Agent Lab, open the list of your created agents.
2. **Select the Agent to Update:**\
Click on the desired agent to open its configuration panel.
3. **Modify Details:**\
Update the agent’s name, description, role, instructions, model selection, tools, examples, knowledge bases, or features as required.
4. **Save Changes:**\
After modifications, click **Save** to apply the updates.
5. **Retest the Agent:**\
Run tests to verify that updates yield the desired improvements.
***
## Updating an Agent
1. **Access Agent List:**\
In the Agent Lab, open the list of your created agents.
2. **Select the Agent to Update:**\
Click on the desired agent to open its configuration panel.
3. **Modify Details:**\
Update the agent’s name, description, role, instructions, model selection, tools, examples, knowledge bases, or features as required.
4. **Save Changes:**\
After modifications, click **Save** to apply the updates.
5. **Retest the Agent:**\
Run tests to verify that updates yield the desired improvements.
 ***
## Deleting an Agent
1. **Navigate to Agent List:**\
Open the list of all agents in the Agent Lab.
2. **Locate the Agent:**\
Find the agent you wish to delete.
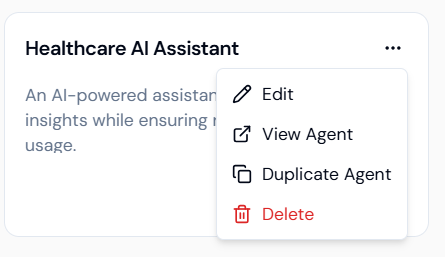
3. **Delete Action:**\
Click the **Delete** option (usually a trash icon or button) next to the agent’s name.
4. **Confirm Deletion:**\
Confirm the action in the prompt to permanently remove the agent.
> **Note:** Deleted agents cannot be recovered. Ensure you have backups or exports if necessary before deletion.
***
## Deleting an Agent
1. **Navigate to Agent List:**\
Open the list of all agents in the Agent Lab.
2. **Locate the Agent:**\
Find the agent you wish to delete.
3. **Delete Action:**\
Click the **Delete** option (usually a trash icon or button) next to the agent’s name.
4. **Confirm Deletion:**\
Confirm the action in the prompt to permanently remove the agent.
> **Note:** Deleted agents cannot be recovered. Ensure you have backups or exports if necessary before deletion.
 ***
***